Crafting your own DIY Easter garland offers a charming and personal touch to your holiday decorations. This detailed guide will walk you through the entire process, from gathering common household materials to creatively displaying your finished piece. Through step-by-step instructions, you’ll learn to design, cut, and decorate shapes like eggs and bunnies. As you assemble the garland, explore tips for personalization, ensuring a unique festive embellishment. With suggestions for displaying your garland creatively within your home, this guide promises an enriching and imaginative Easter project that can be enjoyed by the entire family.
Key Takeaways
- Learn to craft an elegant DIY Easter garland using readily available materials, adding a personal touch to your holiday decor.
- Each step of the process, from gathering resources to cutting and decorating, is designed to be straightforward and accessible.
- Discover creative tips for personalizing your garland, making it a unique reflection of your style and taste.
- The guide offers practical display ideas to ensure your garland enhances your home’s Easter ambiance.
- Explore variations to keep your designs fresh, providing endless possibilities for creative expression.
Gather Your Materials
To embark on your DIY Easter garland project, it is essential to gather all the necessary materials beforehand. This preparation will help ensure a smooth crafting experience and allow you to focus on the creative aspects of your project. Here is a detailed list of materials you will need:
-
Colorful Paper: Choose a variety of vibrant colors to bring your garland to life. Pastels are particularly popular during the Easter season, but feel free to select colors that resonate with your personal style.
-
String or Twine: Use sturdy string or twine to hold your garland together. Opt for a neutral color, or, for an added touch of flair, select a string that complements the theme of your garland.
-
Scissors: Ensure you have a sharp pair of scissors on hand to allow for precise cutting of your paper shapes and other decorative elements.
-
Glue: An adhesive is required to attach embellishments securely. Consider using a clear drying glue to maintain a neat appearance.
-
Decorations: Enhance your garland with an array of decorative items. Consider using artificial flowers, beads, or ribbons to introduce texture and interest. These elements can add dimension and a festive touch to your design.
By gathering these materials in advance, you establish a solid foundation for your crafting endeavor. This thoughtful preparation not only ensures you have all the components required but also allows for a more enjoyable and efficient process, resulting in a beautiful and personalized Easter garland.
Designing Your Garland
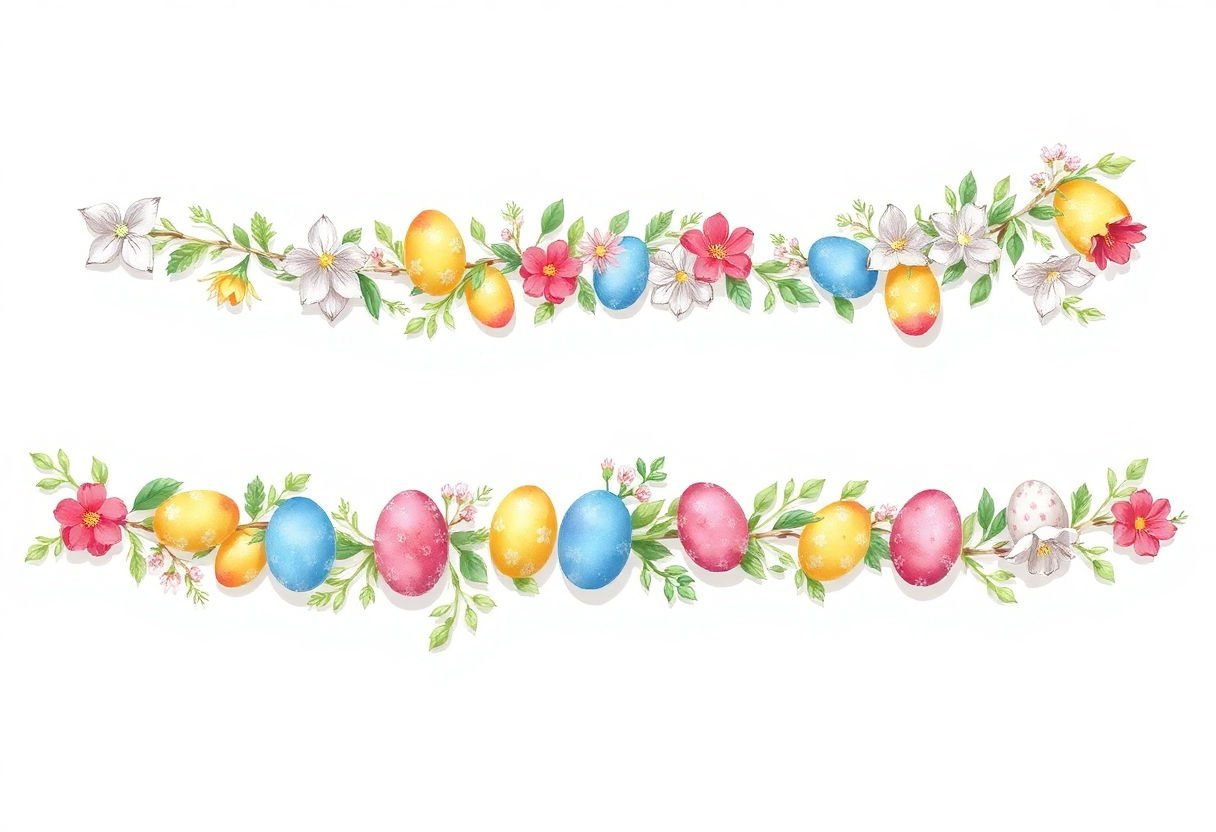
Creating a visually appealing Easter garland begins with a thoughtful design process. The foundation of your garland’s allure lies in its pattern, color scheme, and the materials you choose to employ. Start by envisioning the theme you wish to express. Easter is synonymous with vibrant hues; thus, incorporating bright pastels such as pinks, purples, yellows, and greens can effectively capture the spirit of the season.
When planning your design:
- Consider the balance between different elements, such as shapes and colors.
- Aim for a harmonious blend by repeating shapes like eggs, rabbits, and flowers.
- Explore various geometric forms to add an interesting dimension to your garland.
Pattern repetition plays a crucial role in achieving visual rhythm and consistency. Establish a sequence for your shapes, for instance, alternating between rabbits and eggs, to create a predictable yet dynamic pattern.
For a personalized touch, integrate elements that resonate with your household’s Easter traditions. This might involve adding initials, family symbols, or specific motifs. It’s also vital to decide on the scale and length of your garland based on the space you intend to display it. A short garland can adorn a mantelpiece, while a longer one might drape elegantly across a window or doorway.
In sum, a successful garland design exhibits coherence through thoughtful arrangement, a harmonious color palette, and a touch of individuality. By meticulously planning each aspect, you ensure your Easter garland not only embodies festive cheer but also a reflection of your creative flair.
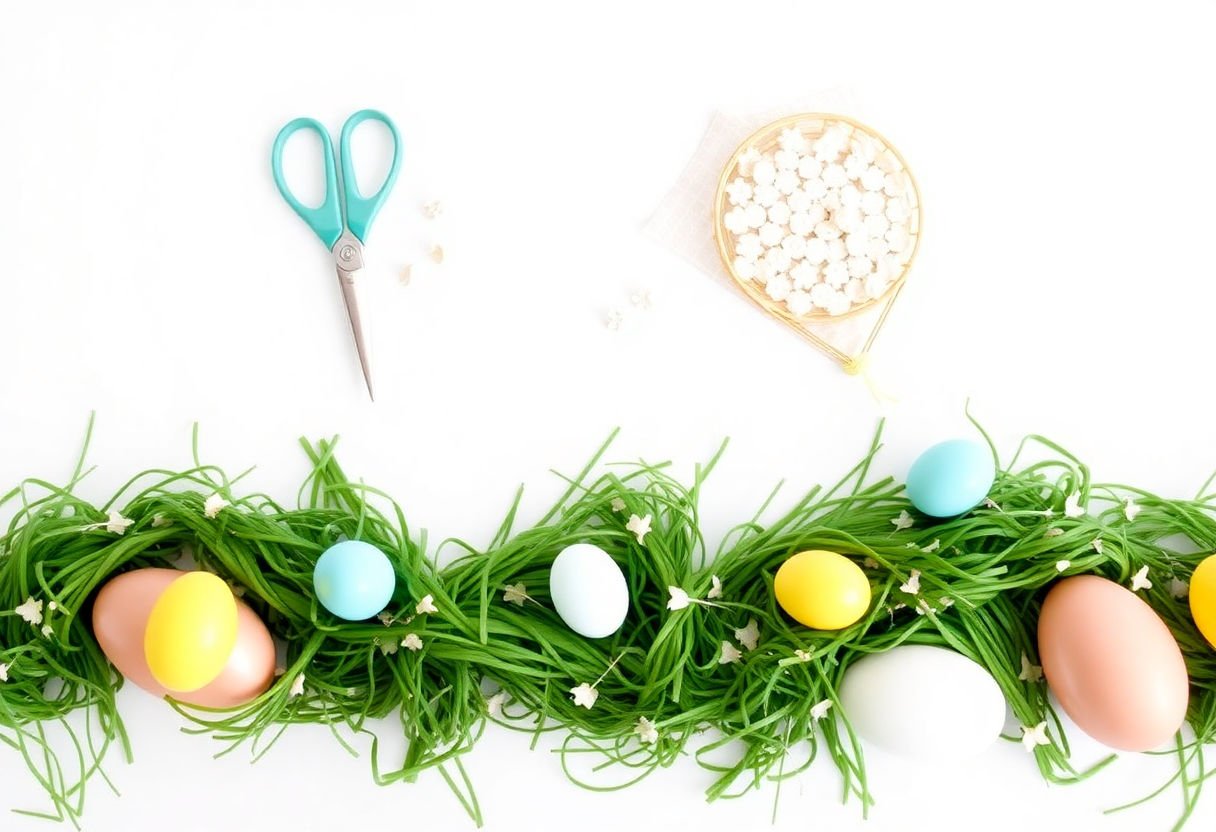
Cutting Shapes
To begin crafting your Easter garland, it is essential to focus on cutting shapes from materials such as colored paper or fabric. These shapes serve as the foundation of your garland and set the tone for its aesthetic appeal. Here is how to master this pivotal step:
Choosing the Shapes:
Start by selecting the shapes that resonate with the Easter theme. Popular choices include:
- Egg shapes
- Bunny silhouettes
- Flowers
- Chicks
Tracing and Cutting:
-
Templates: Use templates to achieve uniform shapes. These can be printed from the internet or drawn by hand on a sturdy piece of cardboard or plastic.
-
Tracing: Place the template on your chosen material, such as construction paper or craft fabric. Use a pencil or fabric marker to trace around the template carefully, ensuring the lines are discernible but not too dark.
-
Cutting: With sharp scissors, follow your traced lines with precision. Sharp scissors not only speed up the cutting process but also ensure clean, smooth edges, giving your shapes a professional finish.
Precision and Alternatives:
- For highly detailed shapes, consider using a craft knife to navigate intricate curves and details.
- If working with younger children, opt for easier shapes like simple ovals and circles and use safety scissors to avoid accidents.
“Cut out shapes with care; they form the backbone of your garland’s design,” emphasizes craft expert Marie Marsh. This step lays the groundwork for subsequent decoration and assembly, influencing the overall appearance and cohesion of your Easter garland.
Decorating the Shapes
Decorating your cut-out shapes is a crucial step in crafting a vibrant and festive Easter garland. This stage allows for creative expression and personalization, ensuring that each piece reflects your unique style.
To begin, select from a variety of decorations that complement the holiday’s cheerful aesthetic. Consider using glitter, which can add a touch of sparkle to your shapes. Lightly apply glue to areas you wish to highlight and sprinkle fine glitter over them, then shake off the excess for a neat finish.
Stickers are another excellent choice for embellishment, offering both simplicity and variety. Choose designs that resonate with Easter themes, such as small chicks, floral patterns, or pastel-colored dots. These can be easily applied and repositioned until you’re satisfied with the arrangement.
For a custom look, paint provides endless possibilities. Use acrylic paint or markers to create intricate patterns or highlight edges. This enables you to incorporate vibrant colors or subtle pastels, depending on your design preference. You might try designing polka dots on eggs or painting delicate petals on flowers.
Additionally, consider adding ribbons or strings for texture. Cut small pieces to tie around the necks of bunny shapes or as bows on eggs, enhancing the three-dimensional aspect of your garland.
These decorative enhancements not only make your shapes visually appealing but also add a personal touch, making your garland a truly unique and engaging Easter decoration.
Assembling the Garland
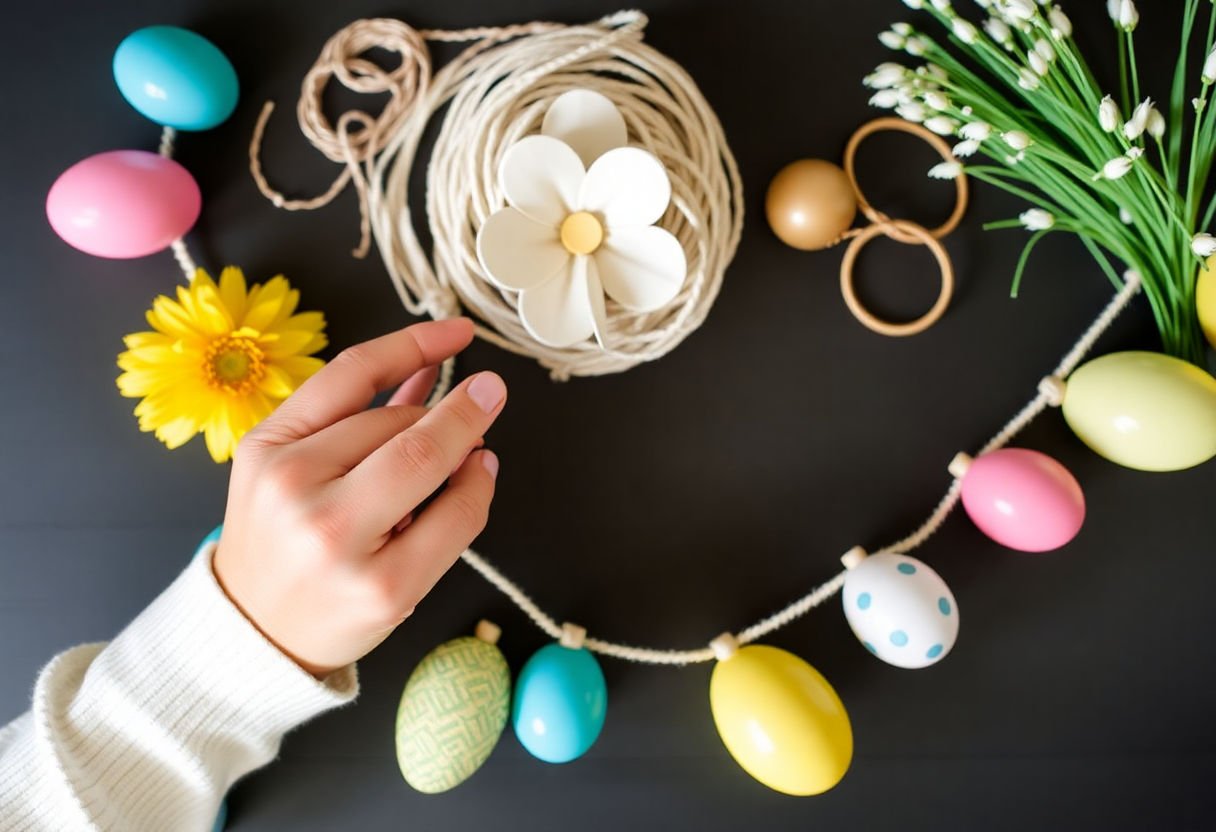
To successfully assemble your Easter garland, begin by choosing a strong yet visually unobtrusive base, such as twine or thread. This component will act as the backbone of your garland, ensuring stability while allowing your decorative elements to shine.
Begin by laying out your decorated shapes in the desired sequence. Use a flat surface for organization and easier manipulation. When deciding on the order, consider both color harmony and thematic consistency with the Easter holiday, ensuring that no single part overshadows another.
Once your pattern is set, secure your shapes to the base. A staple technique involves using a small hole punch at the top of each shape, threading the twine or thread through these holes. Be mindful of spacing—ideally, leave about one to two inches between each piece to prevent overcrowding.
For those looking to avoid holes or prefer a cleaner look, use small craft clips or hot glue. Clips provide the advantage of repositioning if changes become necessary, while glue offers a more permanent solution. Ensure the glue dries thoroughly to avoid slippage.
Finally, measure the available space where the garland will hang. Adjust the length by either trimming the excess base material or adding additional shapes to cover more area. Keep in mind any necessary allowances for hanging or securing the garland at each end, choosing discreet hooks or nails to maintain focus on your handcrafted artistry. With these steps, your garland will be a delightful enhancement to any Easter setting.
Adding Finishing Touches
Enhancing your DIY Easter garland with finishing touches elevates it from simple décor to a standout festive piece. Consider incorporating the following elements to add layers of charm and sophistication:
-
Ribbons and Bows: Silk or satin ribbons can be woven between the shapes or tied into bows at intervals along the garland. This not only enhances the visual appeal but also adds a touch of elegance. Choose colors that complement your main palette, ensuring they harmonize with the existing hues.
-
Organic Accents: Natural materials such as twigs, dried flowers, or faux greenery can add an organic feel. Weave small sprigs of lavender or eucalyptus between the motifs for a rustic touch, or add artificial foliage for a long-lasting finish.
-
Lighting Up the Garland: Small LED fairy lights can be interwoven among your decorations. These lights cast a subtle glow, making your garland perfect for evening events or adding a warm ambiance to any room.
-
Additional Decorations: Use mini egg ornaments or small felt figures of Easter symbols like chicks or bunnies to further personalize your garland. These additions create a multidimensional effect that captivates onlookers.
As you apply these finishing touches, balance is key. While embellishments add beauty, overloading can detract from the overall aesthetic. Aim for a cohesive look by placing decorations evenly throughout the garland or focusing accents where they can make the most impact. By thoughtfully selecting and arranging these elements, you can transform your garland into a breathtaking centerpiece that embodies the spirit of Easter.
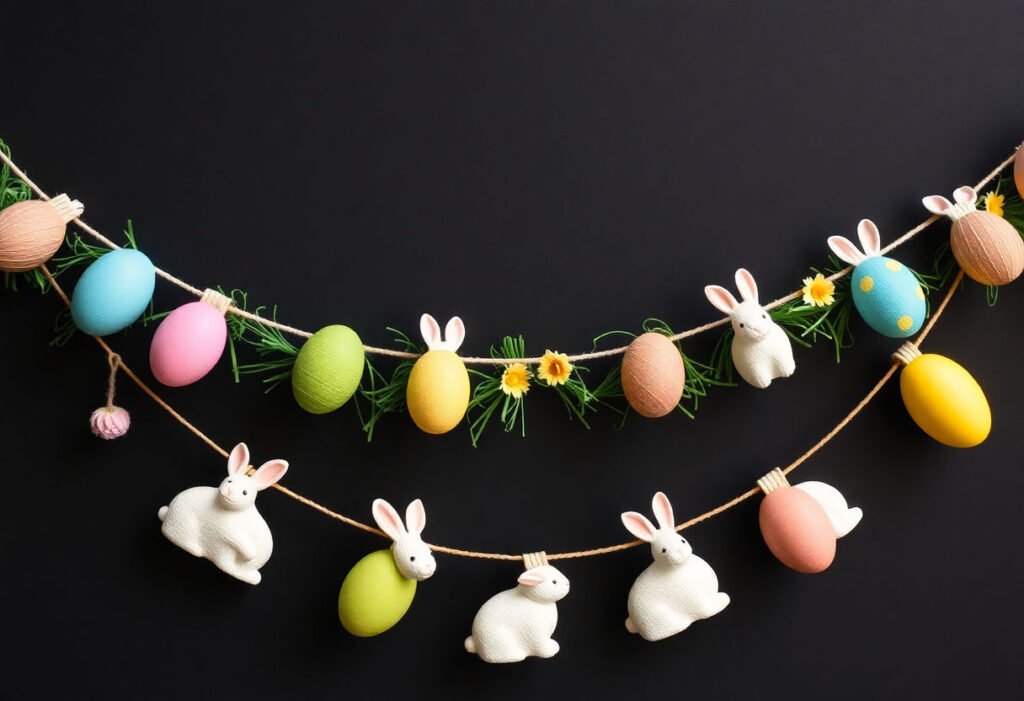
Displaying Your Garland
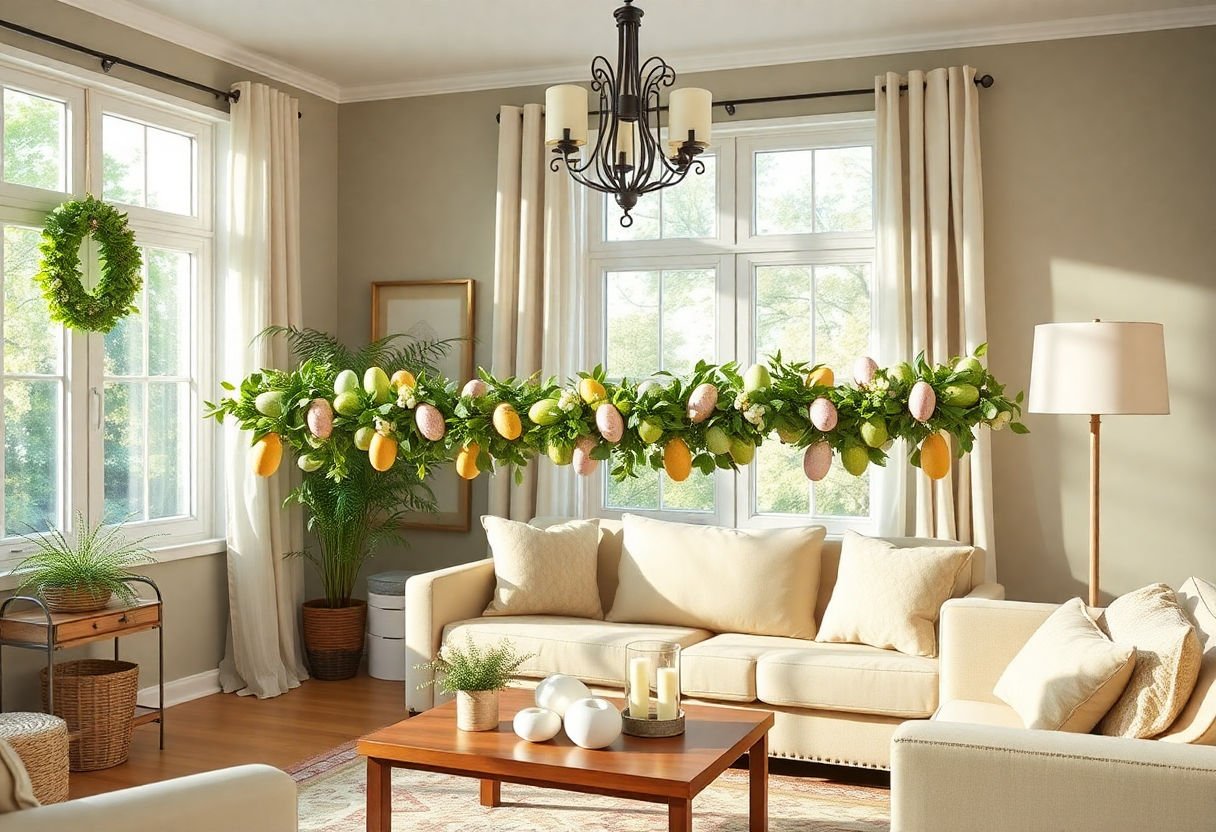
To ensure your DIY Easter garland becomes a captivating focal point in your home, consider the following display suggestions:
-
Choose the Right Location: Selecting an ideal spot is essential. Common areas include fireplace mantels, staircases, windowsills, or entryways. Each location offers unique opportunities to complement your existing Easter decor and enhance the ambiance of the space.
-
Height and Balance: The height at which you hang your garland can dramatically affect its visual impact. For instance, hanging it mid-height on a wall or at eye level around a staircase ensures it catches attention without obstructing pathways. Ensure the garland is symmetrically balanced to maintain an aesthetically pleasing flow.
-
Accent with Lighting: Incorporating soft lighting can enhance the festive aura of your garland. Battery-operated fairy lights or small LED bulbs woven through the garland can create a cozy, enchanting glow that accentuates the vibrant colors and designs.
-
Use Complementary Decor: Add dimension by pairing your garland with other Easter-themed decorations. Consider fresh flowers in matching hues, decorative eggs, or even small bunny figurines strategically placed nearby to create a cohesive theme.
-
Consider Seasonal Integration: To seamlessly integrate your garland into your seasonal decor, choose spaces where other spring elements, like potted plants or seasonal wreaths, are displayed. This creates a unified aesthetic and reinforces the seasonal theme throughout your home.
By thoughtfully considering these display elements, your garland will not only serve as a beautiful decoration but also as a testament to your creativity and Easter spirit.
Creative Variations
For those looking to add a unique twist to their DIY Easter garland, there are countless creative variations to consider. Experimenting with different themes and materials not only personalizes your garland but also enhances its aesthetic appeal.
-
Natural Elements: Incorporate natural materials like twigs, small branches, or dried flowers for a rustic look. These elements can be easily integrated into your garland design, giving it an organic and timeless feel.
-
Themed Color Schemes: Opt for specific color palettes such as pastel hues for a traditional approach or vibrant shades for a modern touch. You can also try a monochrome theme using shades of a single color for a sophisticated appearance.
-
Alternative Materials: Consider using fabric scraps, felt, or even recycled materials like magazines or newspapers to create your shapes. This not only adds a sustainability angle but also introduces different textures.
-
Themed Designs: Create garlands based on popular Easter themes like garden parties with butterflies and floral patterns or a farm-inspired look featuring chicks and farm animals.
-
Interactive Elements: Add tags or pockets to each shape that guests or family members can fill with notes or small trinkets. This can make the garland interactive and engaging, particularly for children.
-
Lighting Additions: Integrate small LED lights or string lights to bring your garland to life, especially for evening displays. This adds an enchanting glow and enhances the overall ambiance of your Easter décor.
By exploring these creative variations, you can craft a garland that’s not only festive but also a reflection of your unique style and creativity.
Conclusion
In crafting your own DIY Easter garland, you not only bring a sense of creativity and personalization to your holiday decorations but also gain an opportunity to streamline your artistic process. This simple yet rewarding project allows for both an expression of individual style and the potential to create cherished family traditions. As you hone your skills, consider experimenting with new themes and materials, contributing to a more eco-friendly approach to seasonal decoration. Embrace the joy of adding your unique flair to this festive craft, while reveling in the satisfying results of a beautifully adorned home.
Frequently Asked Questions
What materials can I substitute if I don’t have all the items listed?
You can easily substitute materials such as using cardstock instead of regular paper or ribbons in place of string. Feel free to use found objects such as buttons or scraps of fabric for additional decorations.
How can I preserve my Easter garland for future use?
To ensure longevity, store your garland in a dry, cool place and consider placing it in a sealed plastic bag to protect it from moisture and dust. Avoid exposure to direct sunlight to prevent fading.
Is it possible to create this garland with children?
Absolutely! This craft is perfect for children with supervision, focusing on safe handling of scissors and glue. Encourage them to personalize their decorations to make it a fun family activity.
Can I include lighting in my Easter garland?
Yes, small LED fairy lights can be woven through the garland to add a subtle glow. Make sure the lights are lightweight and have a battery-operated option to avoid additional cords.
Where are the best places to display my Easter garland?
Hang your garland on a mantel, along a staircase railing, or in an entryway to enhance your Easter decor. It can also be draped across a dining table to serve as a festive centerpiece.