Transform your home into an enchanting holiday wonderland by crafting your own “Nightmare Before Christmas” DIY decor. This guide provides an array of creative ideas for decked-out decor that blends spooky Halloween motifs with the jolly essence of Christmas. You’ll explore themed Jack Skellington pumpkins, eerie wreaths, festive bunting, and alluring table centerpieces. Equipped with a detailed list of necessary materials and tools, this comprehensive walkthrough is designed to guide you in capturing the film’s unique aesthetic. Join us in unraveling the magic as you create your very own spooktacular decor.
Key Takeaways
- This article explores unique DIY decor ideas inspired by the “Nightmare Before Christmas” to transform your home for the holiday season.
- It provides guidance on selecting the most suitable elements from the movie to inspire your themed decor projects.
- A detailed list of necessary materials and tools is offered for various crafting activities to ensure readiness.
- Step-by-step instructions for a range of projects, including Jack Skellington pumpkins and themed table centerpieces, are provided for easy execution.
- The article extends its focus to outdoor decor tips, helping to enhance the external appearance of your home fittingly with the movie’s aesthetic.
Choosing Your Theme

When diving into DIY decor inspired by The Nightmare Before Christmas, selecting the right theme is pivotal in setting the tone for your creative projects. The film’s whimsical yet eerie aesthetic offers a treasure trove of inspiration, allowing you to blend elements from Halloween and Christmas into a cohesive decor scheme that captures the essence of both holidays.
To begin, consider your favorite characters or iconic scenes from the movie. Jack Skellington, with his skeletal grin, might inspire monochrome and striped elements, while the haunting allure of Sally could bring bursts of patchwork colors and ragged textures. Explore the film’s contrasting settings—a spooky Halloween Town or the jolly if not peculiar Christmas Town—to decide whether to lean more towards the eerie or the festive.
Think about incorporating significant motifs such as the crescent moon, twinkling stars, and twisted trees, which can add a haunting beauty to your decor. Prioritize versatility by choosing themes that can easily transition between Halloween and Christmas, ensuring your decor remains relevant throughout the holiday season.
Moreover, opt for a palette that reflects the film’s distinctive visual style. A combination of dark shades interspersed with vibrant pops of color, like Orange, Black, Red, and White, can capture the movie’s surreal spirit. This selection will guide the color choices for your DIY projects, from pumpkin crafts to table centerpieces.
By carefully picking elements that resonate with you and harmonize with the film’s aesthetic, your DIY decor will undoubtedly transform your home into a magical, spooktacular wonderland.
Materials and Tools
To bring the enchanting world of “Nightmare Before Christmas” into your home, it’s essential to have the right materials and tools on hand. Here’s a comprehensive list to ensure your DIY decor projects are both seamless and stunning.
Materials:
- Paints and Brushes: Utilize acrylic paints for a vibrant finish on surfaces like Jack Skellington pumpkins. A variety of brush sizes, including fine-tipped ones, are crucial for detailing.
- Felt and Fabrics: Choose dark and moody hues, such as black, purple, or burgundy, to craft characters like Oogie Boogie.
- Polymer Clay: Perfect for sculpting miniature figurines or adding unique elements to ornaments.
- Wreath Forms: Grapevine or styrofoam wreath bases make an excellent start for haunted wreaths.
- Artificial Flowers and Greenery: Combine seasonal themes by incorporating black roses and faux evergreens.
- LED String Lights: Provide an eerie glow without the fire hazard of candles.
Tools:
- Craft Knife and Scissors: Essential for precise cutting of paper, fabric, and clay.
- Hot Glue Gun and Glue Sticks: A must-have for assembling wreaths, centerpieces, and secure bonding of various materials.
- Sewing Kit with Needle and Thread: Useful for assembling fabric-based projects and adding detailed stitching.
- Stencil Sheets: Ideal for creating consistent shapes, especially when painting character faces or motifs.
These materials and tools will not only bring your DIY decor to life but also infuse your home with the timeless, magical atmosphere of “Nightmare Before Christmas.”
Crafting Jack Skellington Pumpkins
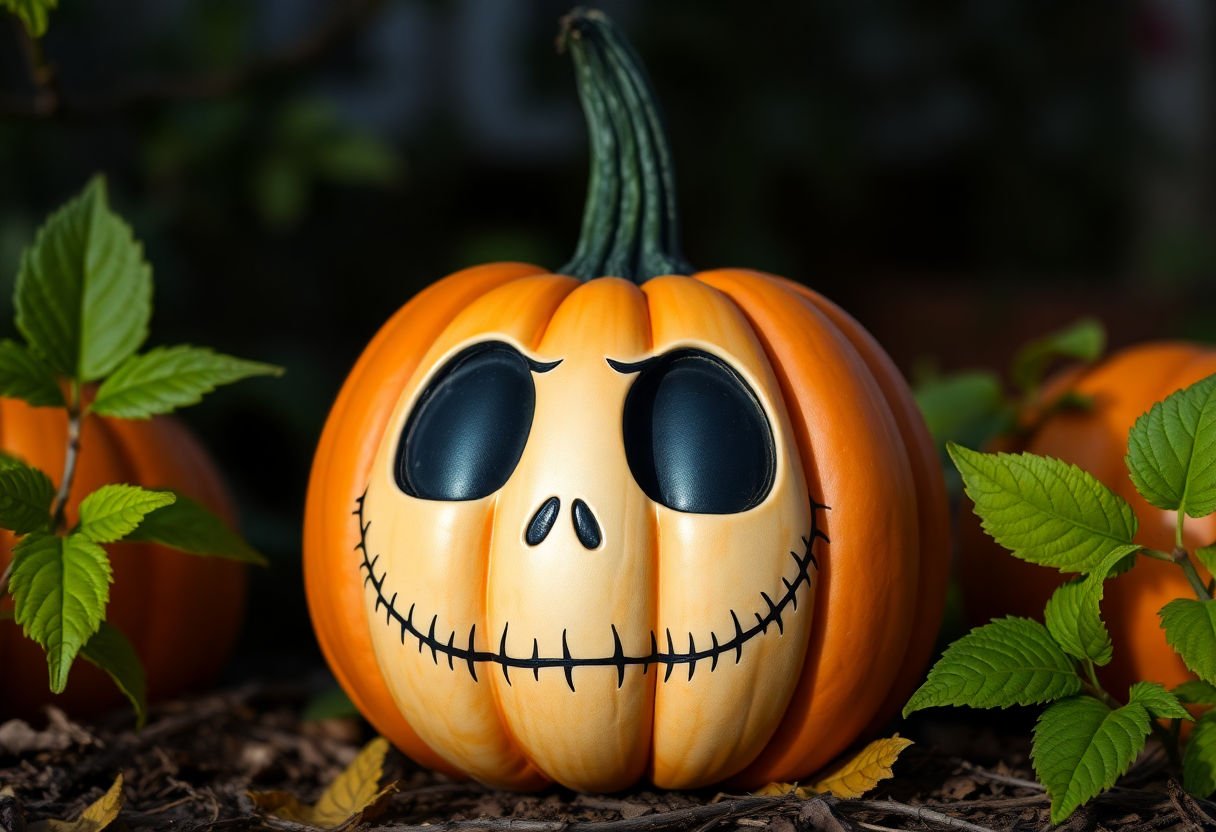
Transform an ordinary pumpkin into a spooky masterpiece inspired by Jack Skellington, the iconic character from “The Nightmare Before Christmas.” This project blends the spirit of both Halloween and Christmas and serves as an eye-catching addition to your DIY decor.
Materials Needed:
- A medium-sized pumpkin (real or artificial)
- Black and white acrylic paint
- Paintbrushes (fine-tipped and broad)
- A stencil of Jack Skellington’s face (optional)
- Sealant spray (for outdoor pumpkins)
To begin, ensure your pumpkin is clean and dry. If using a real pumpkin, cut off the top and remove the seeds and pulp with a spoon. A hollow pumpkin is easier to handle and less prone to damage.
Step-by-Step Guide:
-
Prime the Surface: Apply a base coat of white acrylic paint on the pumpkin. This ensures an even and vibrant surface for Jack’s face. Allow it to dry completely.
-
Design Jack’s Iconic Face: Using a stencil or freehand drawing, outline Jack Skellington’s facial features—distinctive eyes, nose, and the infamous toothy grin. For precision, a fine-tipped brush is recommended.
-
Add Dimension and Detail: Fill in the outlined areas with black paint. Pay extra attention to the eyes and mouth to capture Jack’s mischievous personality.
-
Sealing the Artwork: If displayed outdoors, apply a sealant to protect your creation from the elements.
This Jack Skellington pumpkin not only serves as a festive decoration but also as a testament to artistic creativity, merging the mystical and quirky aspects of the beloved film.
Haunted Wreaths

Crafting a haunted wreath inspired by “The Nightmare Before Christmas” offers a unique way to fuse the eerie charm of Halloween with the joyous spirit of Christmas. These wreaths serve as a delightful nod to the film’s whimsical yet spooky aesthetic, adding a personalized touch to your décor.
To begin, gather a few key materials: a plain wreath base, black and purple ribbons, artificial foliage in dark and muted tones, mini skeletons, and other elements reminiscent of the movie—a plush Jack Skellington, for instance, or Sally-themed fabric patches. You’ll also need hot glue, scissors, and wire cutters for assembly.
-
Prepare the Base: Start by wrapping your wreath base with the selected ribbons. The combination of black and purple will immediately set the tone, providing a dark and mystical backdrop.
-
Add Foliage and Ornaments: Attach pieces of artificial foliage around the base, alternating colors and textures for depth. Secure them with hot glue or floral wire. Incorporate miniature skeletons or pumpkins for added creepiness, while maintaining a certain elegance typically associated with holiday wreaths.
-
Incorporate Character Elements: For a touch of authenticity, include iconic figures or colors from the film. A central Jack Skellington head can serve as a captivating focal point, beautifully juxtaposing the darker elements.
-
Finishing Touches: Add a few quirky ornaments like glittery spiders or bats to enhance the wreath’s spooky appeal while staying true to the film’s playful tone. You may also choose to weave in battery-operated fairy lights for a magical glow.
Displaying your haunted wreath on a front door or mantle will invoke the film’s enchanting ambiance, celebrating the delightful intersection of two beloved holidays.
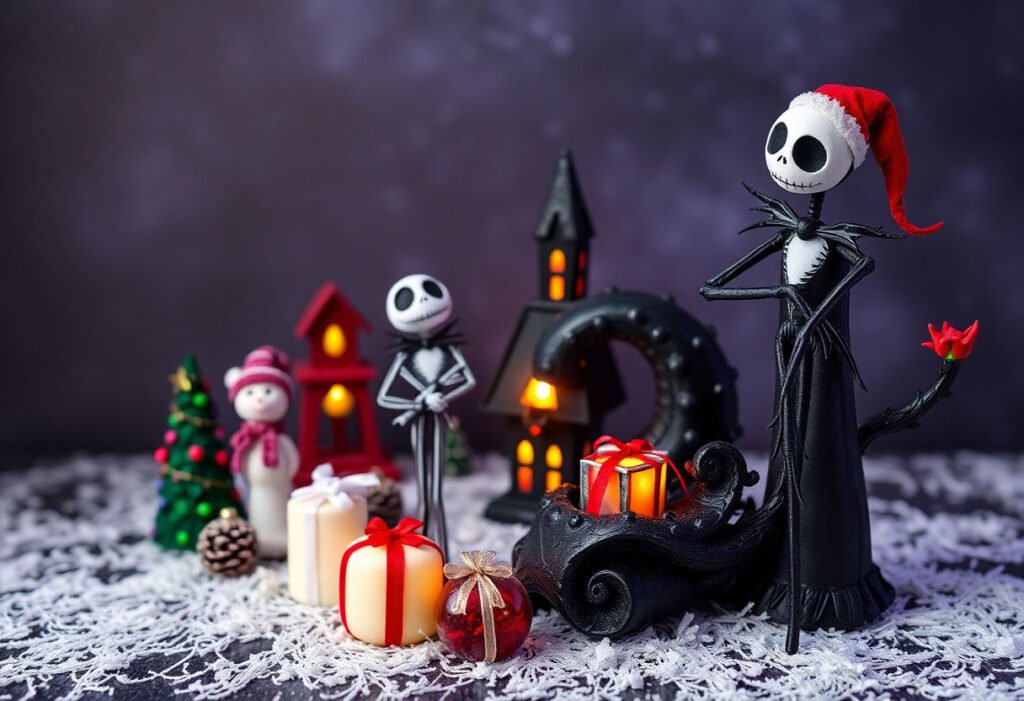
Themed Table Centerpieces
Creating captivating table centerpieces inspired by the “Nightmare Before Christmas” theme allows you to embrace the whimsical, haunting essence of the film. These centerpieces can serve as a conversation starter at your holiday gatherings while seamlessly merging the eerie with the festive.
Begin with a foundation: Consider using a dark table runner or a spooky lace overlay to set the stage for your centerpiece. This backdrop will accentuate the other elements and create a mysterious ambiance.
Element Choice: Choose items that highlight iconic movie elements. For instance, you might use:
- Miniature Jack Skellington figures: Place them strategically to represent his endearing character.
- Black and white candles: These create a solemn yet enchanting glow.
- Vibrant pumpkins: Decorate them with motifs from the movie using contrasting paint colors.
Natural Elements: Incorporate natural materials like dried twigs or black-hued flowers. These add texture and depth, evoking the sinister beauty of Halloween.
DIY Options: Craft unique pieces such as:
- Ghostly garlands made from cotton or gauze, draped artfully across the centerpiece.
- Glitter-covered skulls or bones to add a spooky sparkle.
Incorporate light and shadow by placing LED lights or fairy lights around your elements. This will enhance the ghoulish charm, casting shadows that playfully dance around the room.
Complete your centerpiece with a finishing touch: Add a sprinkle of artificial snow or glitter for a snow-kissed look that nods to the film’s Christmas spirit. By carefully curating these elements, you bring the magical and eerie world of the “Nightmare Before Christmas” to life right on your dining table, inviting guests to step into a storybook setting.
Bunting and Garland
To enhance the enchanting allure of your “Nightmare Before Christmas” themed decor, incorporating bunting and garland is a delightful way to elevate your interior aesthetics. These charming decors not only add a whimsical touch but also blend seamlessly with the holiday spirit.
Materials You Will Need
To craft themed bunting and garland, gather the following materials:
- Colored cardstock or fabric: Choose colors that resonate with the film’s palette, such as black, white, purple, and orange.
- Stencils: Utilize stencils of key characters and symbols like Jack Skellington’s face, Sally’s patchwork dress, and Zero the ghost dog.
- Adhesive or sewing tools: Depending on your material choice, you may need glue or a sewing kit.
- String or ribbon: Opt for sturdy yet flexible strings to securely hang the bunting or garland.
- Scissors: Ensure they are sharp enough to cut through your chosen materials.
Crafting Process
-
Design and Cut: Begin by sketching out your designs based on your selected stencils. Cut out these designs from your chosen cardstock or fabric. The shapes should be distinct and capture the movie’s iconic elements.
-
Assemble the Pieces: Lay out your cut-out designs in sequence. Use adhesive or sewing techniques to attach each piece to your string or ribbon, ensuring they are evenly spaced.
-
Add Finishing Touches: Consider adding small embellishments such as glitter, beads, or fabric paint to enhance the visual appeal further.
-
Display Creatively: Hang your finished bunting and garland in areas where they can be prominently displayed, such as across mantels, doorways, or windows.
By following these steps, you can craft bunting and garland that not only represent the film’s unique aesthetic but also contribute to a festive and spooky holiday atmosphere.
DIY Ornaments and Decorations
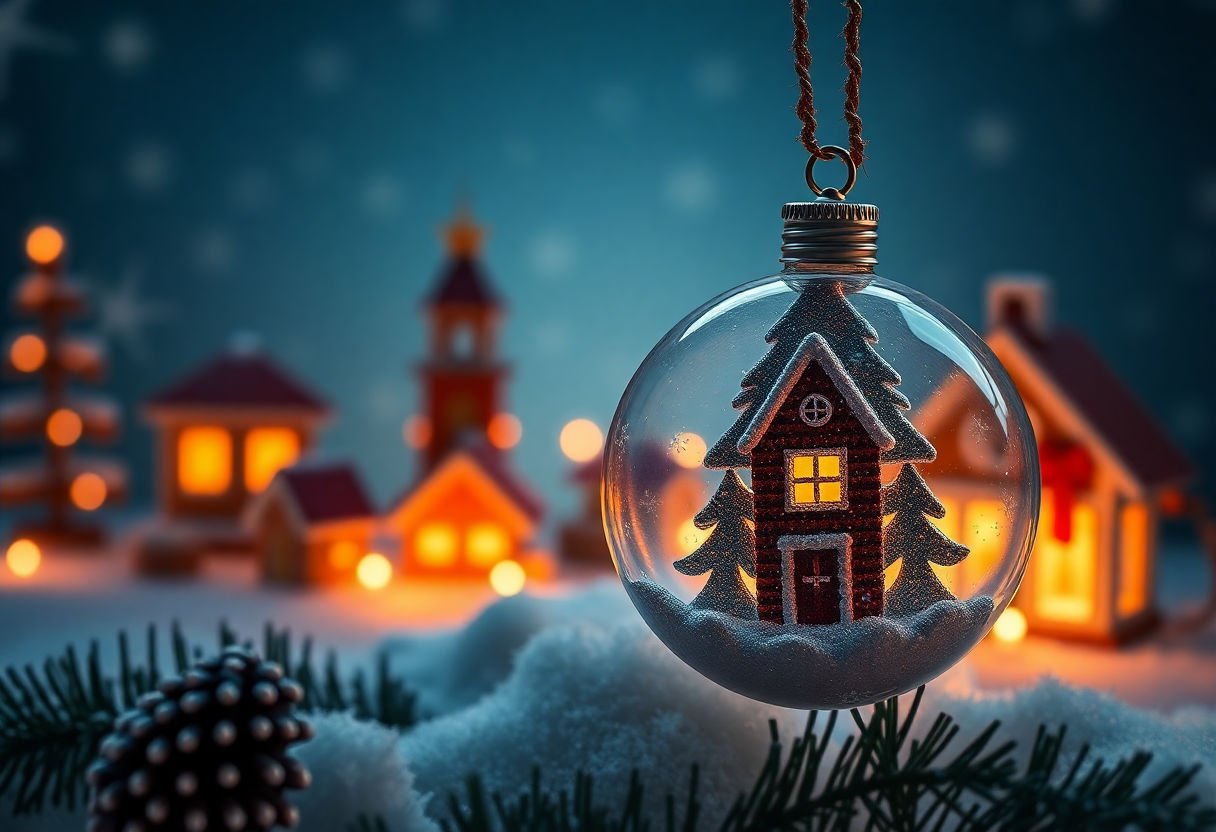
Creating your own DIY ornaments and decorations inspired by “The Nightmare Before Christmas” is a wonderful way to add a unique and whimsical touch to your holiday decor. Drawing from the movie’s iconic characters and darkly enchanting aesthetic, these handmade crafts enhance both Halloween and Christmas festivities.
Begin by crafting Jack Skellington bulbs using clear glass or plastic ornaments. Paint the interiors with white acrylic paint and allow them to dry. On the exterior, draw Jack’s distinctive face with a fine black marker or paint pen. These can be hung on Christmas trees or around the home for a spooky yet festive flair.
Embrace the eerie charm of Sally with patchwork ornaments. Use fabric scraps or colored papers to mimic her patchwork dress. Simply cut the materials into various shapes and adhere them to foam or wooden orbs using decoupage glue. Finish with a coat of sealer to protect your artwork.
Consider incorporating Zero, the ghostly dog, into your decor. Craft Zero-themed hanging ornaments by shaping lightweight clay or using a small ghost-shaped cookie cutter. Once the clay is dry, paint with translucent white and add a red nose for detail.
Additionally, design delicate snowflakes to reflect the dual nature of the holiday. Cut intricate patterns from paper, and then sprinkle them with fine glitter for a frost-like sheen. Hang them from ceiling fixtures or windows to enhance the wintry ambiance.
By using these creative techniques, each handmade ornament becomes a unique piece of art, embodying the spirit of “The Nightmare Before Christmas” and transforming any space into a spooktacular holiday haven.
Outdoor Decor Tips
As you endeavor to extend your “Nightmare Before Christmas” theme outdoors, strategic placements and creative displays become pivotal. Start by transforming your entryway with Jack Skellington-inspired lanterns. These eerie yet enchanting accents can effortlessly set the tone for your theme. Opt for LED candles inside the lanterns for a safe and glowing effect.
Adorning your front yard with graveyard-inspired elements adds a chilling charm. Use weather-resistant materials to craft faux tombstones or repurpose old wooden pallets to create personalized gravestones adorned with quotes from the movie. These can be strategically placed to create a macabre yet intriguing welcome.
Incorporate hanging garlands utilizing movie-themed cutouts. These can be strings of characters like Zero the Ghost Dog or iconic silhouettes, draped across porch railings or along outdoor fences. It is advisable to use waterproof materials to ensure durability against the elements.
Don’t forget to include a spooky wreath as a focal point on the front door. Craft a wreath using monochrome colors – blacks and whites dominate, perhaps with a splash of purple or orange to highlight the season’s spirit while maintaining the thematic integrity.
Finally, consider illuminating your outdoor decor with string lights that mimic the whimsy and slightly eerie atmosphere of the film. Wrap the lights around trees, fences, or frame your windows to evoke the magical crossover of Halloween and Christmas, capturing the enchanting duality inherent in Tim Burton’s classic.
Conclusion
Creating a spooktacular “Nightmare Before Christmas” DIY decor offers an enchanting fusion of Halloween and Christmas that transforms any space into a whimsical wonderland. By selecting key elements from the film, employing essential materials, and following detailed crafting steps, your home becomes a canvas for creativity. This DIY journey not only enhances your holiday ambiance but also invites a personal touch in celebrating dual festivities. As you embrace this unique theme, continue to explore novel ideas, always letting imagination guide you. With every project, your space will echo the festive and eerie charm synonymous with the beloved movie.
Frequently Asked Questions
What essential materials do I need for “Nightmare Before Christmas” DIY decor?
To create “Nightmare Before Christmas” themed DIY decor, you will need materials such as acrylic paints, high-quality brushes, various sizes of craft pumpkins, wreath bases, and ribbon. Specific items like Jack Skellington stencils or character figurines may also enhance your projects.
How much time should I allocate to complete these DIY decor projects?
The time commitment varies depending on the complexity of each project. Simple projects like painting pumpkins may take a few hours, while more intricate decor, such as themed wreaths or table centerpieces, could require up to a day or more.
Are these DIY projects suitable for all skill levels?
Yes, most of these DIY projects can be adjusted to accommodate different skill levels. Beginners can start with simple tasks like painting and progress to more complex creations like crafting wreaths or assembling table centerpieces, as their confidence grows.
Can I use these decorations for both Halloween and Christmas?
Absolutely, one of the advantages of the “Nightmare Before Christmas” DIY decor is its versatility. Many designs, particularly those featuring Jack Skellington or haunting motifs, seamlessly transition from Halloween’s eerie ambiance to Christmas’s festive charm.
What precautions should I take when using tools and materials?
Ensure safety by working in a well-ventilated area and wearing appropriate protective gear, such as masks and gloves, especially when using paints or adhesives. Follow all tool instructions to prevent accidents and achieve the best results with your DIY decor.