Creating an Easter egg wreath adds a vibrant touch to your holiday decor, making it a perfect DIY project for celebrating this festive season. This guide walks you through crafting a beautiful wreath with a detailed list of materials, step-by-step assembly instructions, and tips on adding a personal flair. Discover creative ways to display your masterpiece and learn how to sidestep common crafting mistakes. Whether you’re a seasoned DIY enthusiast or a beginner, this project promises to enhance your home’s aesthetic and bring a touch of spring cheerfulness to your doorway.
Key Takeaways
- Crafting an Easter egg wreath requires a tailored selection of materials, including a suitable base, decorative eggs, and complementary embellishments.
- Steps for creating the wreath involve the careful preparation of egg decorations and a systematic approach to assembling the elements.
- Choosing the right wreath base is essential, as it influences the stability and overall appearance of the final product.
- Personalizing your wreath with unique decorations can enhance its aesthetic appeal and reflect individual style choices.
- Displaying the finished wreath in a prominent location maximizes its festive impact while avoiding common crafting mistakes ensures a seamless DIY experience.
Gather Your Materials
To embark on your DIY Easter egg wreath project, it’s essential to gather all the necessary materials. Having everything ready at the start ensures a seamless crafting experience.
Essential Items
- Wreath Base: Opt for a sturdy base, such as foam or grapevine, that can support the weight of your decorative items.
- Artificial or Real Eggs: Choose from plastic, wooden, or even real eggs depending on your desired aesthetic. Painted or decorated eggs can add a vibrant touch.
- Decorative Ribbon: Select ribbons in pastel colors or patterns to wrap around the wreath or form a bow.
Adhesives and Tools
- Reliable Glue: A hot glue gun works best for securing items to the wreath base due to its quick-drying nature and strong hold.
- Scissors and Wire Cutters: These are vital for trimming ribbons and cutting wires or floral stems to size.
Embellishments and Extras
- Floral Elements: Incorporate artificial flowers, greenery, or foliage to create a lush springtime feel.
- Additional Accents: Consider using small figurines, beads, or glitter for an extra dash of personality and flair.
- Wire and Hooks: Floral wire can help attach elements securely, and hooks are essential for hanging the completed wreath.
These items form the foundation of your creative venture, allowing flexibility to incorporate personal touches. As an old crafting adage goes, “It’s the attention to detail that makes a masterpiece.” By preparing these materials ahead of time, you set the stage for crafting a truly stunning Easter egg wreath that will delight your senses and brighten your home.
Choosing the Right Base
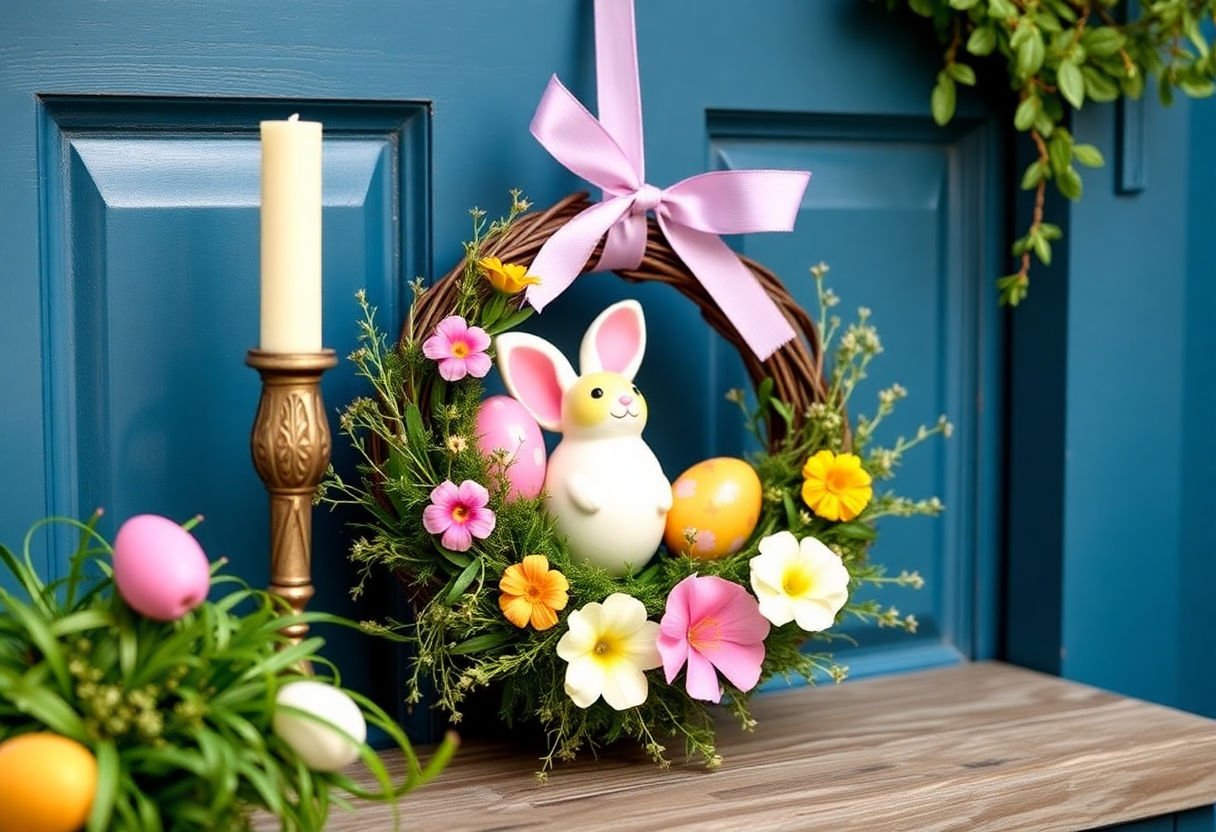
Choosing the right base for your Easter egg wreath is crucial to ensure that your creation is both stable and aesthetically pleasing. Selecting an appropriate base sets the foundation for your entire design, impacting both its durability and style.
Several options are available when it comes to wreath bases, each with its own advantages:
-
Foam Bases: Foam is a popular choice for its light weight and ease of use. It is easy to insert decorations into foam, making it ideal for those planning to incorporate a variety of elements. The light weight also makes it convenient for hanging.
-
Grapevine Wreaths: Grapevine bases offer a rustic charm and natural appearance, making them perfect for a more organic, earthy look. The intertwining vines provide numerous anchor points for securing decorations, which can add depth and character to your wreath.
-
Wire Frames: If you are aiming for a minimalist or modern design, wire frames are a great option. They offer a clean, sleek look and are incredibly sturdy. However, they may require additional work to attach items securely.
When choosing the right base, consider the location and conditions where you plan to display your wreath. For outdoor settings, a wire frame might offer more resilience against weather conditions. For indoor displays, a foam or grapevine base can provide the desired aesthetic effect. Also think about the weight of the materials you intend to use; ensure the base can support them adequately without sagging or falling apart.
Ultimately, the right base should blend seamlessly with your design vision while offering functional support for your decorative elements. Carefully assess your options, aligning them with your creative intentions and the environment in which your wreath will be showcased.
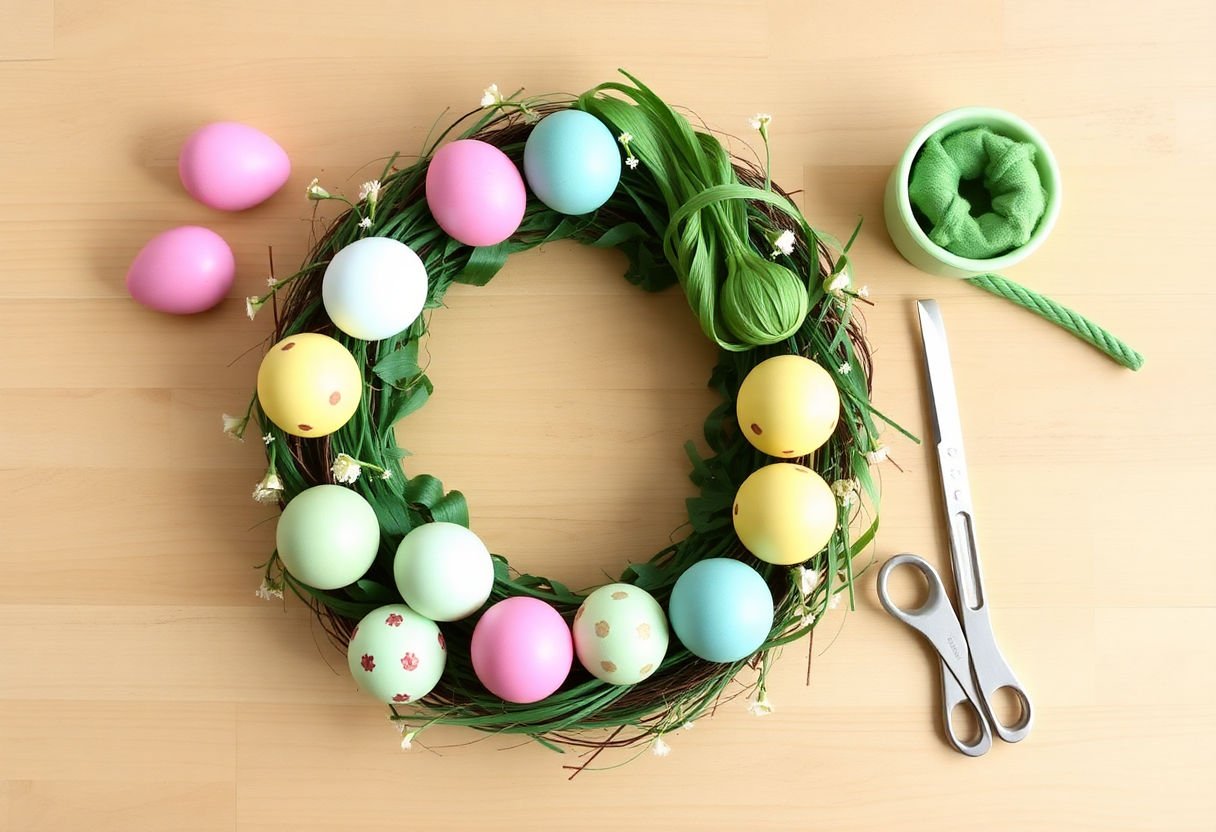
Preparing Your Egg Decorations
To ensure your Easter egg wreath dazzles with charm, begin by preparing your egg decorations with care. Selecting the ideal eggs is paramount. Choose between real eggs, ceramic eggs, or durable plastic eggs. Plastic eggs are often preferred for their resilience, especially if the wreath is displayed outdoors.
Decorating the eggs elevates the aesthetic appeal of your wreath. Here are some creative ideas:
- Painted Designs: Opt for acrylic paints that adhere well to both ceramic and plastic surfaces. Choose pastel hues for a classic Easter look or vibrant colors to make your wreath pop.
- Decoupage: Apply patterned paper or fabric using a decoupage medium for a textured, artistic appearance.
- Glitter & Sequins: Attach these with a clear-drying adhesive to add a touch of sparkle.
Preparing eggs for attachment is crucial for securing them to the wreath base. Drill small holes or use a hot glue gun to affix wooden skewers or floral wire. This technique provides a sturdy means of attaching the eggs without compromising their design.
Consider this insightful tip shared by seasoned crafters: “The key to a balanced wreath is varying both the size and decoration style of your eggs.” Adopting this approach ensures a dynamic and captivating finished product.
In essence, how you decorate and prepare your eggs not only reflects your personal style but also lays the foundation for a stunning Easter egg wreath that will capture the admiration of all who see it.
Assembling Your Wreath
Begin assembling your Easter egg wreath by laying out your wreath base on a flat surface. Start with the largest eggs, positioning them evenly across the base. Ensure they reflect symmetry and balance. Attach each egg with a strong adhesive or a hot glue gun, pressing firmly to secure them in place. It is crucial to allow each egg to dry fully before moving on to the next, ensuring stability.
Next, fill in the spaces between these larger eggs with medium-sized eggs and smaller decorative items. This could include silk flowers, ribbons, or faux greenery, arranged tastefully to enhance your design. Weave these decorations into the wreath with floral wire or small dots of glue, maintaining the overall aesthetic coherence.
While positioning your decorations, consider implementing a thematic color scheme, such as pastel shades typical of Easter, to enhance visual appeal. As remarked by a seasoned crafter, “An Easter wreath mirrors nature’s regrowth — colorful and vibrant.”
For a more personalized touch, incorporate hand-painted eggs or personalized messages on mini tags attached with ribbon. These elements add sentimental value and make your wreath uniquely yours.
Finally, step back and examine your wreath for any sparse areas, filling them carefully while maintaining the harmony of the design. Before displaying, allow time for the wreath to set completely, ensuring all elements are securely attached. With these steps completed, your wreath is ready to dazzle your guests and welcome the joyous season of spring.
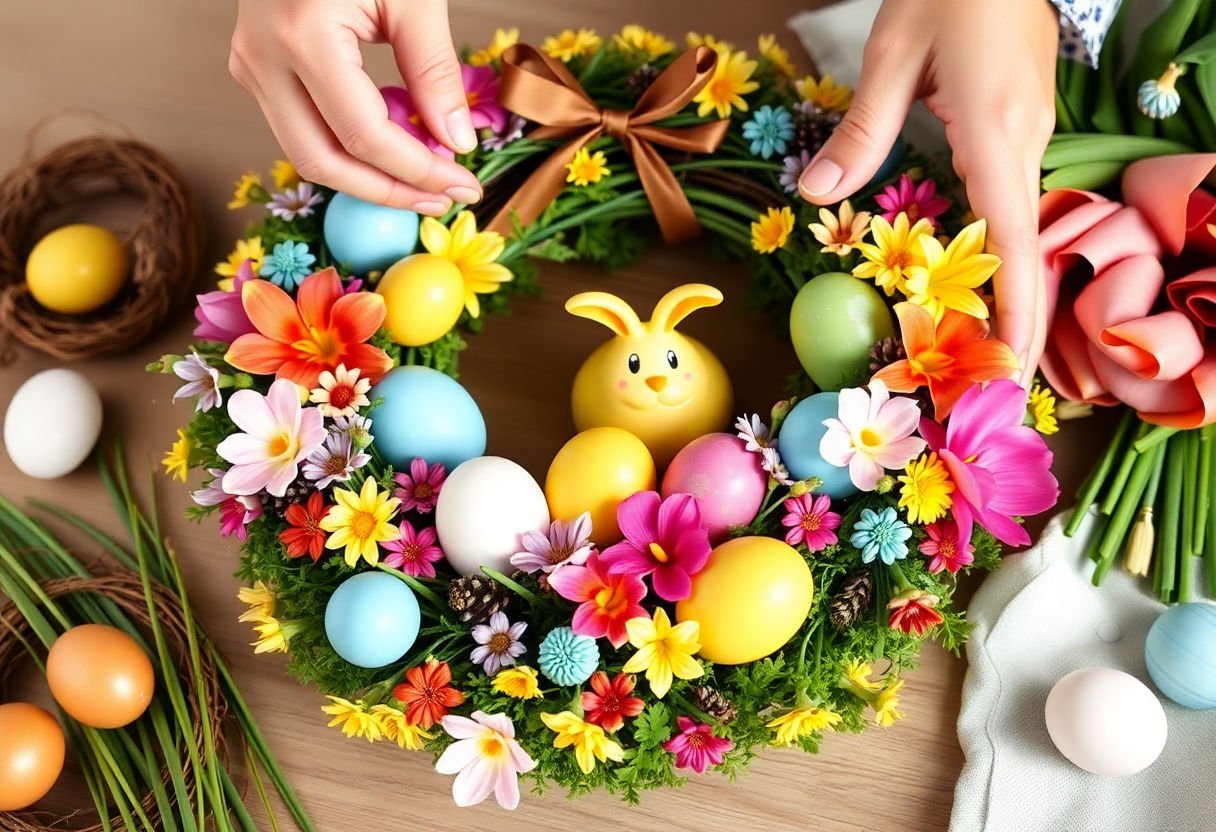
Adding a Personal Touch
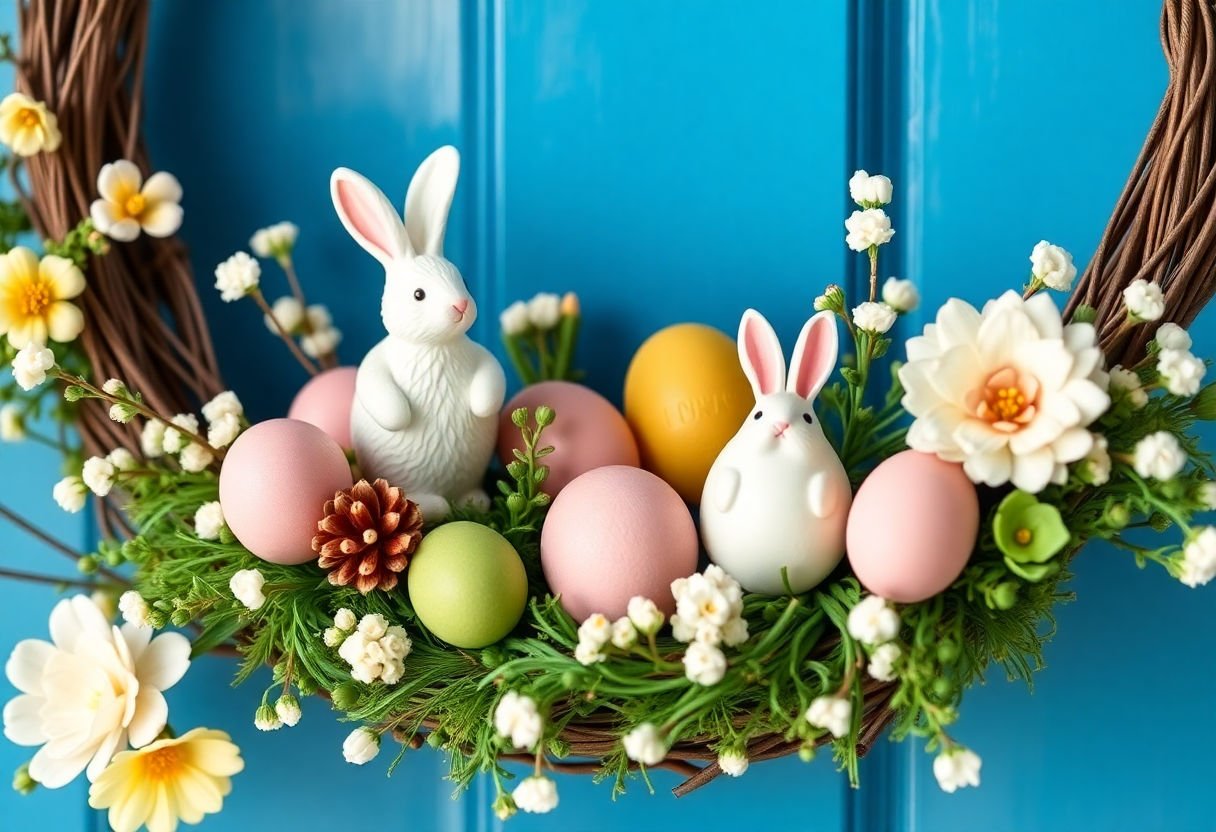
To truly make your Easter egg wreath a reflection of your style and creativity, consider incorporating elements that add a personal touch. These additions can transform your wreath from a simple decoration to a cherished keepsake.
Incorporate Family Heirlooms
Adding small family treasures, such as vintage buttons or brooches, can infuse your wreath with sentimental value. These items not only enhance visual appeal but also commemorate family traditions.
Use Personalized Colors
Choose colors that resonate with you or complement your home decor. Beyond the traditional pastels of Easter, consider hues that hold personal significance. This could be the royal blue of your alma mater or the vibrant green of a cherished memory.
Include Handwritten Notes
Attach small tags with handwritten messages or quotes that evoke the spirit of the season. These can be simple wishes for happiness and renewal, adding a touch of warmth and personality.
Incorporate Natural Elements
Consider integrating elements from nature, such as twigs, feathers, or dried flowers, picked from your garden or favorite walking trail. These add texture and a unique, organic beauty to your wreath.
Display Photos
Miniature frames nestled among the eggs can hold tiny family photos. This personalization makes your wreath a celebration of family and community.
By thoughtfully integrating these elements, your Easter egg wreath becomes more than just a decoration; it becomes a testament to your personal history and creativity.
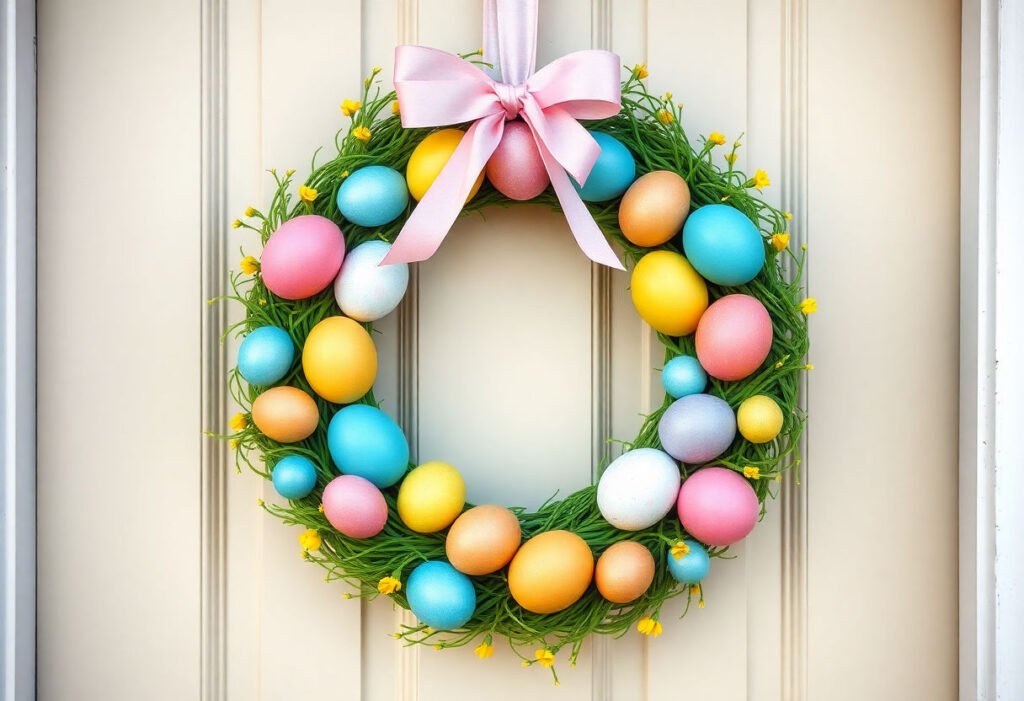
Tips for Displaying Your Wreath
To ensure your Easter egg wreath becomes the centerpiece of your decor, consider these expert tips for optimal display:
-
Location is Key: Choose a prominent place such as your front door, above the mantelpiece, or as a centerpiece on a dining room wall. These locations not only draw attention but also set a festive tone for the entire space.
-
Height Matters: When hanging your wreath, ensure it is at eye level. This position allows guests to appreciate the intricate details and beauty of your handiwork without straining. If displaying it on a mantle, it should be proportionate to the objects around it to avoid overpowering or being overshadowed.
-
Lighting Enhancements: Utilize natural or artificial lighting to highlight the colors and textures of your wreath. Placing it near a light source during the day can accentuate the vibrant hues of the eggs and decorations. At night, consider a gentle spotlight or candlelight to create a warm glow.
-
Seasonal Accents: Complement your wreath with other seasonal decorations, such as fresh or faux spring flowers, to enrich its visual appeal. This thematic cohesion can enhance the overall ambiance and provide a polished, festive look.
-
Protection from Elements: If your wreath will be displayed outdoors, consider the materials’ endurance. Use weather-resistant varnishes or place it under a covered area to protect it from weather damage, ensuring longevity and brilliance throughout the Easter season.
By thoughtfully selecting the display setting and considering these elements, your Easter egg wreath can serve as a stunning focal point, delighting guests and enhancing your home’s festive charm.
Common Mistakes to Avoid
Creating an Easter egg wreath can be thoroughly enjoyable, but several common mistakes can derail your project. Avoid these pitfalls to ensure a seamless crafting experience and an impressive final product.
-
Overloading the Wreath Base: It’s essential to balance the number of decorations with the size of your wreath base. An overly crowded wreath may not only appear clumsy but can also become too heavy, risking structural integrity. Begin by placing larger items first, then fill in with smaller accents, maintaining a harmonious look.
-
Inadequate Attachment Methods: Choosing the right adhesives is critical. Hot glue guns work well for most materials but ensure you use glue suitable for both the base and decorations. For more delicate ornaments like real eggs, consider using a more gentle adhesive or securing them with ties.
-
Neglecting Color Coordination: The charm of an Easter wreath lies in its vibrant, cohesive color scheme. Avoid selecting colors randomly. Instead, envision a palette that complements both your home decor and seasonal aesthetics. A strategic use of pastels typically enhances the festive spirit.
-
Skipping Weather Protection: If displaying your wreath outdoors, take steps to protect it from the elements. Consider sealing painted items and using weather-resistant materials. This precaution ensures your wreath’s beauty lasts throughout the Easter season.
-
Forgetting Final Checks: Before hanging your wreath, inspect it thoroughly. Ensure all elements are securely attached and the design is balanced. Regularly check its condition if displayed outside, adjusting as needed to preserve its appeal.
By avoiding these common mistakes, you’ll craft an Easter egg wreath that is both beautiful and enduring.
Conclusion
Crafting a stunning Easter egg wreath is not only a joyful endeavor but also a meaningful way to celebrate the season and showcase creativity. By selecting the right materials and applying personalized touches, you can create a unique decoration that adds charm to your home. This project not only encourages creative expression but also enhances your DIY skills, supporting future seasonal decorations. Embrace the opportunity to explore new designs and techniques, ensuring your Easter egg wreath stands out as a testament to your crafting prowess and festive spirit.
Frequently Asked Questions
How can I ensure the eggs don’t fall off the wreath?
To help ensure your eggs are securely attached, it is vital to use a strong adhesive, such as hot glue or a silicone-based glue. Make sure to apply the glue generously at the point of attachment and allow adequate drying time before handling the wreath.
What type of wreath base is best for an Easter egg wreath?
The ideal wreath base should be both sturdy and easy to work with. Foam and grapevine bases are popular choices as they offer stability and a surface that easily holds glue and additional decorations.
Is it better to use real or artificial eggs for the wreath?
The choice between real or artificial eggs depends on your preference and intended longevity of the wreath. Artificial eggs are recommended for durability and ease of handling, whereas real eggs can offer a more authentic look but may require careful preparation.
How can I personalize my Easter egg wreath?
Personalizing your wreath can be achieved by incorporating elements that reflect your style or theme. Consider adding ribbons, flowers, or custom-painted eggs to create a unique and personalized piece.
What are some common mistakes to avoid when making an Easter egg wreath?
Common mistakes include insufficient adhesive use, uneven placement of decorations, and selecting a base that cannot support the weight of the decorations. To avoid these, plan your design carefully and ensure each component is appropriately secured.