Immerse yourself in the mystical charm of Tim Burton’s classic, ‘The Nightmare Before Christmas’, as you embark on a journey of creative expression through DIY paper crafts. Perfect for infusing Halloween spirit into your home, this guide will lead you through each step to create enchanting decorations, featuring iconic characters like Jack Skellington and Sally. Discover the joy of crafting as you learn about selecting the right materials, integrating Burton’s unique style, and even adding magical lighting effects. Set your creativity free and transform simple paper into a bewitching Halloween scene, captivating anyone who beholds it.
Key Takeaways
- Discover the joy and excitement of crafting themed paper decorations inspired by ‘Nightmare Before Christmas’ for Halloween.
- Gain insight into the essential materials and tools required to create well-crafted and imaginative paper designs.
- Follow comprehensive, step-by-step guides to master crafting beloved characters like Jack Skellington, Sally, and Zero.
- Learn to enhance your Halloween crafts with Tim Burton-inspired colors, details, and lighting effects for a spooktacular display.
Getting Started with Your ‘Nightmare Before Christmas’ Paper Crafts
Embarking on your ‘Nightmare Before Christmas’ paper craft journey requires a bit of preparation to ensure a smooth and enjoyable experience. The first step is to gather all necessary materials which typically include various types of paper, scissors, glue, and decorative elements like markers or glitter to add a touch of creativity.
Setting Up Your Workspace
Creating a designated area for crafting is crucial. Choose a spacious, well-lit table or desk where you can comfortably lay out all your materials. Good lighting is essential not only for precision in cutting and assembling but also for avoiding strain on your eyes. Keep everything within reach—organize your tools and materials in a way that complements your workflow, perhaps using small containers or trays.
Gathering Inspiration
As you prepare, immerse yourself in the unique world of ‘Nightmare Before Christmas’ by revisiting the movie or exploring fan art. This can ignite creative ideas and help you visualize how to infuse the characters’ essence into your crafts. A little inspiration goes a long way in crafting something truly spooktacular.
Basic Tools Overview
For successful crafting, basic tools such as a sharp pair of scissors, a reliable adhesive, and precise cutting tools like X-acto knives should be considered. Additionally, having a cutting mat can protect your surfaces and improve the accuracy of your cuts.
By systematically organizing your materials and workspace, you lay the foundation for a delightful crafting experience, allowing you to focus on the art of bringing Halloween magic to life with your paper creations.
Choosing the Right Materials
When crafting paper decorations inspired by The Nightmare Before Christmas, selecting the appropriate materials is crucial for achieving both durability and aesthetic appeal.
Paper Types: Begin by choosing high-quality cardstock for the main structural elements of your crafts. Cardstock provides the necessary stability and is available in various colors, ideal for capturing the vibrant hues of Halloween. For intricate details, opt for lightweight paper such as crepe or tissue paper, which offers flexibility and ease in handling. Embossed or textured papers can also be a fantastic choice for adding dimension, replicating the whimsical style of Tim Burton’s beloved characters.
Craft Tools: To bring your imaginative designs to fruition, a well-equipped toolkit is essential. Use precision cutting tools like craft knives or scissors with fine tips for clean, detailed edges. Incorporate a cutting mat to protect surfaces and ensure safety. Adhesives such as glue sticks or tacky glue work well, but for more robust components, consider a hot glue gun for a secure bond.
Embellishments: Enhance your creations with embellishments that add character and allure. Metallic foil or glitter can introduce a dash of sparkle reminiscent of Jack Skellington’s magical world. For authenticity, use markers or paints to create distinct facial expressions and patterns, mirroring the film’s original designs.
By thoughtfully selecting materials and tools, your ‘Nightmare Before Christmas’ crafts will not only capture the essence of Halloween but also showcase the enchanting quirkiness of this iconic film.
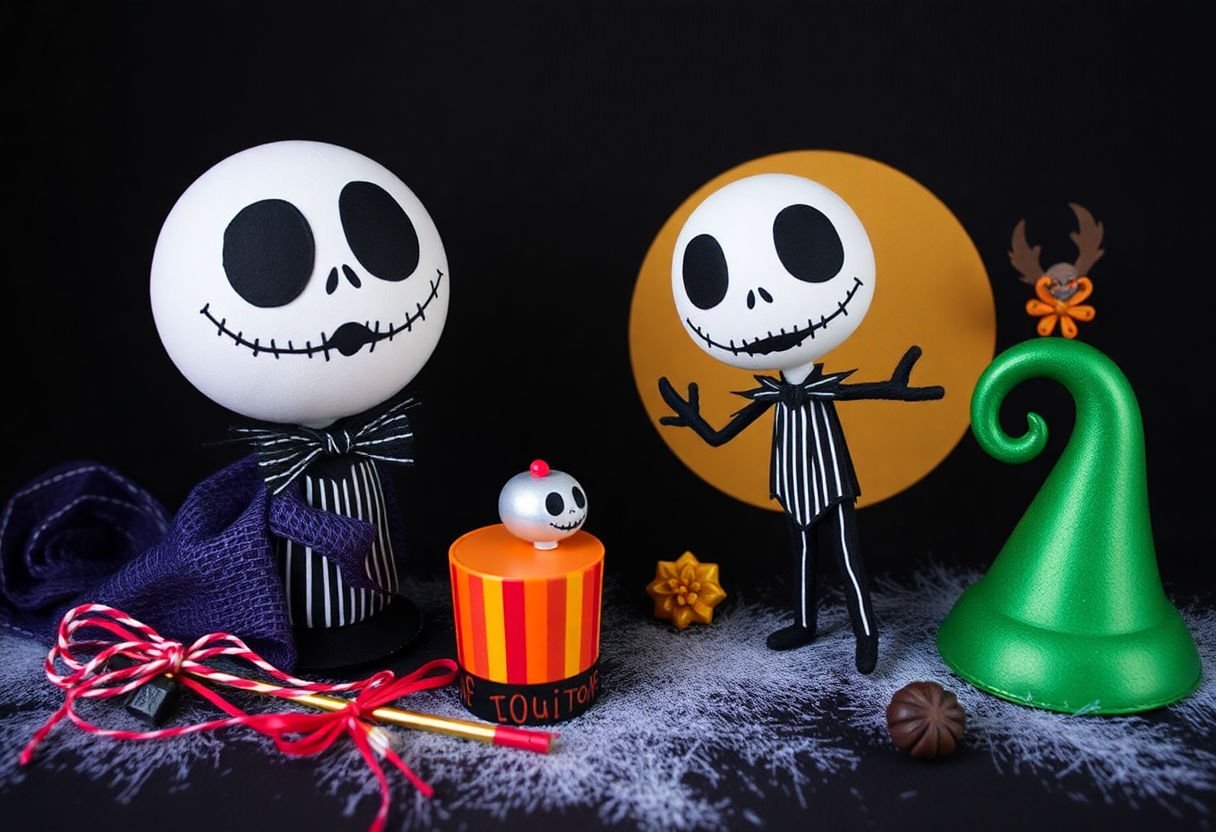
Crafting Jack Skellington: A Step-by-Step Guide
Crafting a Jack Skellington paper craft requires not only creativity but also precision. To start, gather the following materials: black and white cardstock, a sharp craft knife, a cutting mat, a pair of scissors, a pencil, a ruler, and glue.
Begin with the head and face, an iconic part of Jack Skellington’s character. Using white cardstock, draw a circle approximately 4 inches in diameter. Carefully cut this out. Sketch his eyes—two perfectly round, dark holes—and carve them with the craft knife. Add the curved lines to define his nose and a stitched grin using a black marker for precision.
For the body, use black cardstock to cut out a rectangular piece about 6 inches long and 4 inches wide. Create Jack’s skeletal look by cutting two strips that will serve as his “bones” for arms. Attach them to the back of the rectangular torso using glue.
The next step involves crafting his signature bat bow tie. Trace a bat shape onto black cardstock and cut it out. Attach this carefully beneath Jack’s head, allowing it to add flair and dimension to the character.
Finally, assemble your creation by affixing Jack’s head to the top of his body with glue. Ensure the bow tie is prominently placed to capture his distinguished style.
This simple yet effective process brings Jack Skellington to life, making it a distinctive craft for Halloween festivities. Through a blend of creativity and craftsmanship, you can master this spooky yet charming paper project.
Creating Sally: Bringing Her Charm to Life
Crafting Sally, the enchanting rag doll from “The Nightmare Before Christmas,” involves a blend of creativity and precision. To bring Sally’s charm to life in paper form, start by selecting the right colors and textures that capture her patchwork dress and expressive eyes. Use a quality cardstock in earthy tones for her attire, and choose a gentle blue for her skin to mirror her unique aesthetics.
Begin by sketching Sally’s outline, ensuring to include her recognizable features such as her long, flowing hair and stitched smile. Cut out her body parts meticulously, incorporating the details that define her character—particularly the stitched patterns on her dress, which can be added using fine-tipped markers or pens for precision.
Assembling the pieces requires patience. Use paper fasteners or glue to attach her arms and legs, enabling some mobility if desired, which adds an interactive element to your craft. Pay particular attention to her eyes, as they play a pivotal role in capturing her soulful expression. Creating layers with different pieces of colored paper can add depth and dimension, enhancing her lifelike appearance.
Consider adding accessories or props, such as small felt flowers, to reflect her nurturing, creative spirit. As quoted by Sally herself, “I am restless, I can’t help it,” remember that your creation breathes life into her resilient and caring nature. Through careful crafting, Sally becomes more than just a paper doll; she transforms into a vibrant, whimsical piece of art, perfectly suited for your Halloween collection.
Designing Zero: The Ghostly Canine

To bring Zero, Jack Skellington’s faithful ghost dog, to life in your paper craft collection, start by focusing on simplicity and charm. Constructing Zero’s ethereal form is not only enjoyable, but it’s also an opportunity to highlight your attention to detail and creativity.
Firstly, gather the appropriate materials for your Zero craft, selecting lightweight white cardstock as the primary medium. This choice is crucial, as it mimics Zero’s ghostly appearance while maintaining stability. Additionally, have a small amount of black and orange paper for added features like Zero’s nose and eyes.
Follow these steps to design Zero:
- Create the Body: Begin by cutting an elongated oval shape from the white cardstock for Zero’s body. To form the characteristic trailing ghost shape, taper one end into a delicate point.
- Fashion the Head: Cut a separate piece for the head in a similar style—a smaller oval—but with a pronounced tip to form the snout.
- Add the Features: Use black paper to cut small circles for the eyes, attaching them thoughtfully to evoke Zero’s animated spirit. For the nose, design a tiny jack-o’-lantern using orange paper to add a unique, recognizable touch.
- Assemble Zero: Glue the head to the body, making sure the pieces align fluidly for an organic look. Secure the eyes and nose in place and allow it to dry completely.
This design ensures Zero’s whimsical essence is captured perfectly, adding a delightful element to your ‘Nightmare Before Christmas’ Halloween display.
Incorporating Tim Burton’s Unique Style
Tim Burton’s unique style is characterized by its dark, whimsical aesthetic that perfectly suits a Halloween theme. To incorporate this into your ‘Nightmare Before Christmas’ paper crafts, focus on using a palette that captures the essence of Burton’s worlds. Opt for colors like deep blacks, soft grays, misty blues, and vibrant purples to echo the film’s gothic charm.
Here are some elements to consider when infusing Burton’s style into your crafts:
-
Textures and Patterns: Emulate the gothic, spooky textures seen in Burton’s films by using papers with intricate patterns. Choose materials that mimic aged wood, stone, or even incorporate a faux vintage look to add depth.
-
Character Details: Pay attention to the quirky details that make each character unique. For example, replicate Jack Skellington’s pinstripe suit using finely detailed black and white paper or capture Sally’s patchwork dress with carefully selected scraps of fabric or textured paper.
-
Exaggerated Shadows: Burton’s style is known for its play with light and shadow. Use bold contrasts and sharp edges in your paper cutouts to create striking silhouettes that are quintessentially Burton-esque.
-
Symbolic Motifs: Integrate iconic symbols, such as the curled hilltop, twisted trees, and spiraling patterns, which are hallmarks of Burton’s style. These motifs can be layered or used as backgrounds to enhance your crafts’ visual appeal.
By focusing on these aspects, your creations will not only embody the spirit of ‘Nightmare Before Christmas’ but will also pay homage to the timeless allure of Tim Burton’s artistic vision.
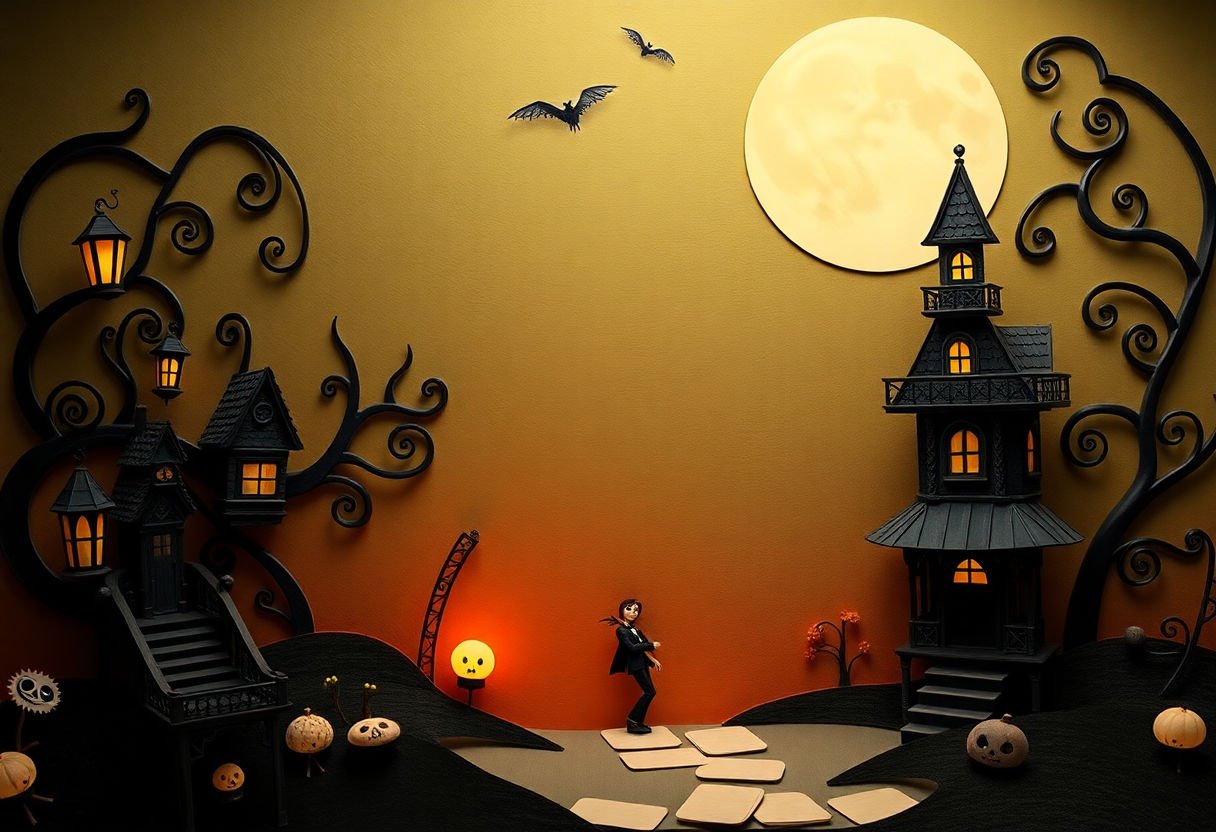
Creating a Spooktacular Halloween Scene

To bring your Nightmare Before Christmas paper crafts to life in an unforgettable Halloween scene, consider creating a display that embodies the eerie yet enchanting essence of the film. Begin by selecting a suitable location within your home or yard, ensuring ample space to showcase each crafted character.
Setting the Scene
- Backdrop: Use dark, rich colors to emulate the film’s moody aesthetic. Consider a black or midnight blue background with accents of deep purple or crimson to enhance the haunting ambiance.
- Props: Integrate miniature props, such as tiny pumpkins, faux graves, and twinkling fairy lights, to build depth and intrigue within the display. These elements will help to highlight the paper characters you have crafted.
Arranging Characters
- Usage of Layers: Position Jack Skellington prominently, perhaps centered or elevated, to make him the focal point. Sally, known for her charm and resourcefulness, can be placed nearby, her pose suggesting a dynamic interaction with Jack.
- Enhancing Personality: Zero, the ghostly canine, might hover above or beside Jack, accentuating his ethereal quality with wisps of translucent paper or cotton to mimic ghostly movement.
Adding Atmospheric Elements
- Lighting: Use strategic lighting to cast dramatic shadows and add a sense of movement. Consider LED candles or glow-in-the-dark accents for an otherworldly glow, enhancing the scene’s spookiness.
- Sound: If possible, include subtle sound effects, like distant howling winds or creaking gates, to immerse visitors fully in the Halloween spirit.
Incorporating these elements thoughtfully will transform your DIY 'Nightmare Before Christmas' crafts into a spooktacular Halloween scene that captivates and delights.
Adding Light Effects to Enhance Your Crafts
Integrating light effects into your ‘Nightmare Before Christmas’ crafts can elevate them from mere decorations to enchanting showcases. This process not only highlights the intricate details of your creations but also imbues them with a mystical aura that captures the spirit of both Halloween and the beloved film.
When selecting illumination techniques, consider using LED lights for their safety and longevity. LEDs are ideal for paper crafts due to their low heat emission, reducing the risk of damage or fire. Battery-powered LED fairy lights, in particular, are versatile and can be easily intertwined or discreetly positioned to provide an ambient glow.
Create distinct atmospheres by experimenting with different lighting styles:
- Backlighting: Place lights behind translucent paper crafts, such as Jack Skellington’s iconic face, to create a dramatic silhouette effect.
- Spotlighting: Use focused lights to draw attention to specific features of your crafts, enhancing details like Sally’s patchwork or Zero’s glowing nose.
- Color-changing lights: Incorporate multicolored LEDs to transition between hues, echoing the whimsical unpredictability of Tim Burton’s universe.
Moreover, placement and arrangement are crucial. Position your illuminated crafts in areas where they can be admired without causing shadow obstruction. String lights can also be used creatively in the backdrop to mimic a starry night, thus completing your Halloween tableau.
As you add these magical enhancements, your creations will not only serve as static decorations but as living, breathing entities that mesmerize all who behold them, truly bringing a piece of Halloween Town to your home.
Conclusion
Mastering the art of ‘Nightmare Before Christmas’ paper crafts not only enriches your Halloween decorations but also unlocks your creative potential. By understanding the essential materials and cultivating skills like crafting Jack Skellington, Sally, and Zero, you gain a unique artistic touch reminiscent of Tim Burton’s iconic style. The incorporation of light effects further enhances the magic of your scene. As you continue to explore these techniques, remember the joy and satisfaction that comes from transforming simple ideas into spooktacular decorations, inspiring endless possibilities in your crafting journey.
Frequently Asked Questions
What are the essential materials needed for ‘Nightmare Before Christmas’ paper crafts?
To create these charming paper crafts, you will need high-quality paper in various colors and thicknesses, a selection of crafting tools such as scissors, a precision knife, and crafting glue. These will help capture the intricate designs characteristic of the ‘Nightmare Before Christmas’ theme.
How can one incorporate lighting effects into paper crafts?
You can enhance your crafts by using LED lights or small fairy lights, which can be integrated discreetly into your displays to add a magical aura. Be mindful of fire safety and use battery-operated lights to avoid risks associated with overheating.
Can beginners easily create Jack Skellington and Sally crafts?
Absolutely. The step-by-step guides in this article are designed to accommodate beginners, simplifying the creation of both Jack Skellington and Sally with clear instructions and illustrations that ensure a fun crafting experience.
Is it possible to customize the paper crafts to fit different Halloween themes?
Yes, these crafts offer great versatility, allowing you to adapt colors, add personal touches, or incorporate additional elements to suit a variety of Halloween themes while maintaining the essence of ‘Nightmare Before Christmas’.
Are these paper crafts suitable for children?
While the crafts are suitable for a broad audience, adult supervision is recommended for children, especially when using sharp tools or adhesives. These projects can be a wonderful opportunity for collaborative family crafting fun.